|
The Truth Seeker
Tony Stone Matthew 7:7-8 Ask,
and it shall be given you. Seek, and you. shall find. Knock, and it shall be
opened unto you. For every one that asks receives. And he that seeks, finds.
And to him who knocks, it shall be opened. John 8:32 Then
you will know the truth, and the truth will set you free. Prepare For the Government HELL Thats Coming
This is just a movie. The real thing will be a lot worse. Left Behind: Rise of the Antichrist (2023) How should you respond to a disaster?
Situational Awareness
Master your mind with the timeless wisdom of Stoicism When
to Bug Out
South Africa's July 2021 riots
The South
African government reported that 354 people had died in the riots. The South
African Property Owners Association (SAPOA) put the loss to Durban’s GDP in
excess of R20 billion and damage to property, buildings and stock holdings at
R30 billion.
How
to create the ultimate bug out plan
Wilderness medical kits How to build an IFAK and save money!
Wilderness
Medical Kits (Tiered Levels) Basic Kit (Day
Hike / Short Trips) ·
Lightweight, for minor injuries and stabilization until
evacuation. ·
Adhesive bandages (various sizes) ·
Moleskin / blister pads ·
Antiseptic wipes ·
Small tube of antibiotic ointment ·
Ibuprofen / acetaminophen ·
Antihistamine (diphenhydramine or loratadine) ·
Elastic bandage (for sprains) ·
Tweezers + small scissors ·
Medical tape (rolled flat) ·
Nitrile gloves (1–2 pairs) ·
Compact CPR face shield ·
Emergency blanket ·
Personal meds (minimum 24 hrs supply) Intermediate
Kit (Backpacking / Multi-Day Trips) Adds supplies for more serious but
still common wilderness injuries. Includes all of Basic Kit, plus: ·
Trauma dressing / Israeli bandage ·
Sterile gauze pads (assorted) ·
Gauze rolls & triangular bandage ·
Tourniquet (CAT or SOF-T) ·
Hemostatic gauze (QuikClot,
Celox) ·
SAM splint (compact, moldable) ·
Saline ampules or irrigation syringe (for wound cleaning) ·
Burn gel / hydrogel dressing ·
Oral rehydration salts / electrolyte packets ·
Antidiarrheal (loperamide) ·
Antacids ·
Steri-Strips or butterfly closures ·
Safety pins (gear + sling use) ·
Small first aid manual / reference card Advanced Kit
(Remote Expeditions / High-Risk Activities) Designed for situations where
professional help may be delayed days or weeks. Includes all of Intermediate
Kit, plus: ·
Second tourniquet (backup) ·
Chest seal (vented, for penetrating chest trauma) ·
Scalpel blade or safety razor blade (sterile) ·
Additional hemostatic agents ·
More trauma dressings (carry at least 2–3) ·
IV/IO access gear (if trained & legal in your area) ·
Advanced airway adjuncts (OPA/NPA) ·
Epinephrine auto-injector (if at risk / trained use) ·
Prescription antibiotics (for long expeditions, physician
guidance) ·
Extra burn dressings ·
Thermometer (digital) ·
Larger supply of medications (multi-week) ·
Splinting material for long bones (extra SAM splint, or improvise
with trekking poles + padding) ·
Waterproof notebook + pencil for medical notes Quick Rule of Thumb ·
Basic = scrapes, blisters, minor illness → good for day
hikes. ·
Intermediate = wounds, fractures, bleeding control → good
for multi-day treks. ·
Advanced = life-threatening trauma, extended isolation →
good for expeditions, guides, or wilderness medics. Choosing a Bug Out Location
My Bug Out Bag and Why It Works
Tiered Bug-Out
Bag Checklists Basic BOB
(Grab-and-Go / 24–48 hrs) Lightweight kit for fast
evacuation or urban emergencies. Goal: Immediate survival,
mobility, and essentials only. Water & Food ·
1–2 L water bottle (metal preferred) ·
Portable water filter straw (LifeStraw / Sawyer Mini) ·
24–48 hrs rations (energy bars, trail mix, jerky) Shelter & Warmth ·
Emergency Mylar blanket (or bivy sack) ·
Lightweight poncho (doubles as rain gear + shelter) ·
Spare socks + underwear First Aid & Hygiene ·
Compact first aid kit (bandages, antiseptic wipes, pain meds) ·
Personal prescription meds (minimum 2 days) ·
Wet wipes / sanitizer Tools & Gear ·
Multi-tool ·
Lighter + waterproof matches ·
Flashlight (small, with spare batteries) ·
Whistle (signal) ·
Small amount of cash Standard BOB
(Full 72 hrs) Balanced kit for most
emergencies — urban or wilderness. Goal: Self-sufficiency for 3
days with moderate comfort. Includes everything in Basic,
plus: Water & Food ·
Hydration bladder (2–3 L) ·
Water purification tablets (backup) ·
Freeze-dried meals (3 days) ·
Small stove + fuel + titanium cup/spork Shelter & Warmth ·
Lightweight tent or tarp + 50 ft paracord ·
Sleeping bag (season-rated) ·
Insulating layer (fleece/wool) ·
Ground pad (foam or inflatable) First Aid & Hygiene ·
Expanded first aid kit (trauma supplies + OTC meds) ·
Toothbrush + small toothpaste ·
Soap sheets / biodegradable soap ·
Insect repellent + sunscreen Tools & Gear ·
Fixed blade survival knife ·
Folding saw or hatchet ·
Duct tape (flat-packed) ·
Notebook + pencil ·
Local maps + compass ·
Headlamp (hands-free) ·
Power bank for phone Clothing ·
Waterproof outer shell (jacket/pants) ·
2–3 pairs spare socks & underwear ·
Gloves + hat (season dependent) Advanced BOB
(Expedition / High-Risk Zones) For long-term survival or areas
with delayed rescue. Goal: Sustainment, redundancy, and security beyond 72
hrs. Includes everything in Standard,
plus: Water & Food ·
Collapsible 10–20 L water container (camp use) ·
Extra purification method (pump filter or gravity system) ·
Fishing kit or small snares (for food gathering) ·
1–2 weeks’ worth of calorie-dense food (if feasible) Shelter & Warmth ·
Full 4-season sleeping bag ·
Backup shelter option (tarp or bivy) ·
Extra clothing layers (cold/rain gear redundancy) First Aid & Hygiene ·
Full wilderness first aid kit (trauma dressings, splint, meds) ·
Prescription antibiotics (with physician guidance) ·
Quick-dry towel ·
Hygiene kit (razor, nail clippers, menstrual supplies if
applicable) Tools & Gear ·
Secondary knife or backup cutting tool ·
Small shovel or entrenching tool ·
Solar/crank emergency radio (with USB charging) ·
Sewing kit (heavy-duty thread + needles) ·
Zip ties (various sizes) ·
Signal mirror ·
Backup flashlight/headlamp ·
Encrypted USB drive with digital documents Communication & Security ·
Spare phone or satellite communicator (Garmin InReach,
etc.) ·
Firearm + ammo OR pepper spray (where legal & trained) ·
Pepper spray or baton (if firearm not an option) ·
Copies of ID, passport, insurance (laminated & digital) ·
Extra cash (local + USD in small bills) Quick Use Cases ·
Basic = City evacuation, flood/fire escape, short-term
displacement. ·
Standard = General bug-out bag for most people (best balance). ·
Advanced = Expeditions, conflict zones, or prepping for total
grid-down. Seven (7) essential knots you need to know
How to build a fire in the wilderness
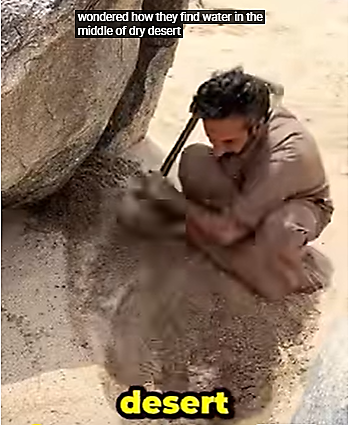
How Bedouins find water in the desert
Five (5) Bushcraft Shelters
Survival gardening: best crops to grow for preppers
Complete process to make BioGas from
cow dung
The easiest wind generator you'll ever make
|
Chapter 9 Surviving the
Antichrist If
you have accepted Jesus Christ as your saviour and been baptised in water,
and of the Holy Spirit, then you do not need to read this chapter. However,
if you have family and/or friends that have not become born-again Christians,
then you need them to read this chapter. _____________________________________________________________________________________________________________ In the Book of Revelation 13, it talks of the antichrist, the evil mirror image of Jesus Christ, as the beast, and describes his role in the end times. The prophet John, of Patmos, paints this description of Satan, as the dragon, the antichrist, as the beast, with his the false prophet as the second beast. In Revelation
13:1-18 John wrote, “And I stood upon the sand of the sea, and saw
a beast rise up out of the sea, having seven heads and ten horns, and upon
his horns ten crowns, and upon his heads the name of blasphemy. 2 And the beast
which I saw was like unto a leopard, and his feet were as the feet of a bear,
and his mouth as the mouth of a lion: and the dragon gave him his power, and
his seat, and great authority. 3 And I saw one
of his heads as it were wounded to death; and his deadly wound was healed:
and all the world wondered after the beast. 4 And they
worshipped the dragon which gave power unto the beast: and they worshipped
the beast, saying, Who is like unto the beast? who
is able to make war with him? 5 And there was
given unto him a mouth speaking great things and blasphemies; and power was
given unto him to continue forty and two months. 6 And he opened
his mouth in blasphemy against God, to blaspheme his name, and his
tabernacle, and them that dwell in heaven. 7 And it was
given unto him to make war with the saints, and to overcome them: and power
was given him over all kindreds, and tongues, and nations. 8 And all that
dwell upon the earth shall worship him, whose names are not written in the
book of life of the Lamb slain from the foundation of the world. 9 If any man have an ear, let him hear. 10 He that
leadeth into captivity shall go into captivity: he that killeth
with the sword must be killed with the sword. Here is the patience and the
faith of the saints. 11 And I beheld
another beast coming up out of the earth; and he had two horns like a lamb,
and he spake as a dragon. 12 And he exerciseth all the power of the first beast before him,
and causeth the earth and them which dwell therein
to worship the first beast, whose deadly wound was healed. 13 And he doeth
great wonders, so that he maketh fire come down from heaven on the earth in
the sight of men, 14 And deceiveth them that dwell on the earth by the means of
those miracles which he had power to do in the sight of the beast; saying to
them that dwell on the earth, that they should make an image to the beast,
which had the wound by a sword, and did live. 15 And he had
power to give life unto the image of the beast, that the image of the beast
should both speak, and cause that as many as would not worship the image of
the beast should be killed. 16 And he causeth all, both small and great, rich and poor, free
and bond, to receive a mark in their right hand, or in their foreheads: 17 And that no
man might buy or sell, save he that had the mark, or the name of the beast,
or the number of his name. 18 Here is
wisdom. Let him that hath understanding count the number of the beast: for it
is the number of a man; and his number is Six hundred threescore and six. -
In Christian eschatology, the Great Tribulation is a seven-year period
where, those who have not been taken up through the rapture into Heaven will
experience hardships, persecution, disasters, famine, war, pain, and
suffering, which will affect all of creation, and precede the judgment of all
when the Second Coming takes place. But, what will life be like under the
rule of the antichrist, whose number is 666? The Holy Bible tells us in the Book
of Revelation 13:16 that “he causes all, both small and great, rich
and poor, free and bond, to receive a mark in their right hand, or in their
foreheads.” And, unless you wear this mark, you will not be able to buy
or sell. And, if you do not take the mark, you will be persecuted, and
killed. More importantly, if you do take the mark of the beast, it will invoke
the wrath of God and He will punish you – severely. Those who take the mark
have made the choice to serve Satan rather than choose Jesus Christ, and God
the Father. Just one of the things that will happen to you, if you take the
mark, is described in the Book of Revelations 16:2, “So the first
angel went and poured out his bowl on the earth and a harmful and painful
sore afflicted the people who had the mark of the beast.” So, receiving the
mark of the beast is a damnable sin and you will find yourself in the fires
of Hell - with Satan. So, what choice do you have today? Well, you can stubbornly sit on the
fence and adopt a wait and see approach or, while you are still alive, accept
Jesus Christ as your Lord and Saviour, and be born again – not that you will
escape the effects of the Great Tribulation period if you made this choice
after the rapture. But, if you keep your head about you, you just might be
able to survive the Great Tribulation period – if you bugout. What do we mean
by this? It means going to live and survive off grid, and that is what this
chapter is about. If you are taken in the rapture, and your spouse or a child is not,
you need to prepare anyway so that they will be able to escape and survive in
the wilderness. They need to have access to your survival gear, plan etc. Possible
types and levels of disasters With the rapture having taken place, and so many people suddenly “gone
missing”, there will be chaos. For the next seven years you will be faced
with enormous challenges, a series of disasters on a largescale and across
geographic, political, and academic boundaries. Disasters require a level of
response and recovery greater than local communities can provide. Any case,
you will be on your own. The disasters you will face will include one or more
of the following: ·
Societal
collapse, widescale rioting and crime ·
Widespread
political and/or religious persecution ·
Large-scale
flooding ·
Major
storms, typhoons, hurricanes, tornadoes ·
Widescale
earthquakes ·
Volcanic
eruptions of magnitude ·
Tsunamis
of scale ·
Nuclear
explosions and/or reactor failure ·
An
uncontrollable disease epidemic or pandemic ·
Global
or regional wars How you will deal with any of the above will determine your ability to
survive. There is much to be said about the Boy Scouts and Girl Guide moto “Be
Prepared.” All too often we become complacent and yet, from the list of disasters
above we can see that we could be affected by any one of these disasters at
any time. Being prepared means planning, training, and educating yourself and
your family and friends about these disasters, how to mitigate and even
survive these disasters. Mitigation includes taking action to prevent or
reduce the cause, impact, and consequences of disasters. In reacting to a disaster, we need to be rational about it. The table
below is a guide to the severity of disaster and what sort of response is
needed. Table: Disaster response Guide
In the immediate aftermath of a disaster, how you respond is quite
critical. During the response phase, business and other normal day-to-day
operations do not function normally. Personal safety and wellbeing in an
emergency and the duration of the response phase depends on the level of
preparedness. The decision to bugout should not be taken lightly, but with
due care and rational consideration. What do I mean by rational
consideration? The first thing to consider is the likelihood of recovery.
Given the situation can you, your community and your country recover, and how
quickly? If your life and the lives of your family are threatened, and likely
to stay threatened, then immediate recovery will not be possible. Perhaps
also not in the short- to medium-term either. Worse still, in the long-term.
The decision to bugout also depends on how local, provincial and state
government reacts to the disaster and their capability in effectively
mitigating the disaster. First steps Back in 2004, a friend, Bart Oldenboom and
myself, developed a knowledge management training course for the University
of South Africa’s MDP and MBL programmes under Professor Raphael Mpofu. In
kicking off the class, I split the class into four teams and told them to
choose a spokesperson. I then gave them each a piece of paper, line-divided
into two rows and three columns. In the top row, middle column, I put a
circle with the words “Hill 99” in it.
I informed them that the top row was enemy territory and the bottom row was friendly forces. The middle column is their “Area of Responsibility” while the columns to the left and right are their “Areas of Interest”. Their objective, as the general of own forces, “is to capture Hill 99.” Go away and come back with a strategy. Eagerly rushing off to their respective breakaway rooms and then sending their spokespersons back, one by one, saying, “we can’t do this because we don’t have any information.” Exactly!! In order to make effective decisions (the right decisions, right), you need information. The same applies to your preparedness and mitigation and recovery plans. In the Book of Proverbs 15:22, it says, “Plans fail for lack
of counsel, but with many advisers they succeed.” So, do your homework.
Read or talk to experts. The first thing to do is look around you, where you live, where you work, where your kids go to school and where your wife works. Disaster is not always thoughtful and happens when you are all at home. So, is your area prone to tornadoes, earthquakes floods, possible nuclear accident or attack, street rioters and criminals, and so on. You need to know how to get your family together so that you can execute your emergency plan. Each family member needs to know exactly how they will get to your rally point, your home and/or an alternative. Some really tough decisions may well need to be made, for the good of the family group, their survivability and recovery. In some instances, time is of the essence and any delay on the part of an individual could well jeopardise the safety of the majority. Not an easy decision but one that a given situation will demand and will probably break your heart. The key here is to keep your head and think rationally, which brings us to the issue of having a destination, and an alternative destination,
of where you are going to bugout to, if that is what you will need to do. You may well have a cut-off time that every family member is acutely aware of, at which point the objective becomes getting to the rally point or destination, or its
alternative. In such a situation the family will have to trust God that the missing family member will make it there safely. Sacrificing the safety of the family group should and must be non-negotiable. If one family member wishes to go off on a search and rescue mission, then the rest of the family group need to stick to the emergency plan. STOP: Physically stop, and think Once a disaster has happened you need to stop for a moment, calm down and collect your thoughts. In the Book of Proverbs
13:16 it says, “Every prudent man acts with knowledge, but a fool flaunts
his folly.” Overly emotional people are more of a burden and can weigh down the family group struggling to deal with their own emotions and the reality of their new situation. Stay calm and think. Activate your emergency plan. Get your mind right! In the Book of Philippians 4:6-7 it says, “Do not be anxious
about anything, but in everything by prayer and supplication with
thanksgiving let your requests be made known to God. And the peace of God,
which surpasses all understanding, will guard your hearts and your minds in
Christ Jesus.” First and foremost, get your mind right. Simply put, a survival mentality is the inward knowing that you can do what needs to be done to overcome whatever adversity you might be facing. In looking at the Boy Scouts movement and the Preppers brigade, we can learn quite a lot. The first is developing a survivalist mentality, which means having the will to live no matter how difficult the adversity or how multi-faceted. There are hidden hazards abound, but also remedies and solutions that can help us recover our advantages and be safe with our families. According to Tim MacWelch of Popular Science’s Outdoor Life, there are nine attributes to a survivalist mindset. These are: 1. Tenacity This simply means sticking to something and not giving up, no matter what. Whether you call it guts or grit, this facet of your survival mindset is all about endurance. You have to hang in there, even when it seems everything you have done or tried {so far) has failed? Tenacity doesn’t have anything to do with physical toughness or stamina. It’s a mental attitude and a manifestation of the strength of your will and the toughness of your mind. A truly tenacious person will push themselves to tolerate the intolerable, suffer through the insufferable, and survive the situation that no one expected them to survive. It’s all about overcoming your inner weaknesses and fighting your desire to give up. A lengthy wilderness survival setting in the wake of a major disaster will be difficult. It’s hard enough just to stay alive, let alone endure feelings of anxiety or depression, or suicidal thoughts. So, get into a daily routine, a routine designed to sustain the liveability of life as much as possible for you and your family group. You need to manage your stress levels. Worry, fatigue, injury, dehydration, and lack of sound sleep will add to your stress levels. You will need to watch yourself and your family members for signs of anxiety, depression, anger, frustration, hyperactivity, guilt, suicidal talk, and irrational behaviour. Since professional mental health care and the right medicines are unlikely to be available to you in your disaster setting, you’ll need to do whatever you can for each other. Talk it out, as much as you can, and find ways to cope until the situation improves. 2. Adaptability Adaptability
is one of the crown jewels of the survival mindset. As the Boy Scouts put it – improvise. To be adaptable, you must be able to change along with changing events, situations, and environments. It’s all about flexibility and trying new options. If you get lost in the woods one afternoon, you may not make it home to your own bed. An adaptable person will assess the situation and realize that their bed isn’t an option, so they’ll have to find a new place to sleep. Since there’s no water faucet in the wild, they’ll find a new source of water. There’s no fridge either, so they’ll find a new source of food. Improvisations may not be as good as you would like, but they’ll be good enough for the time being. An adaptable survivor can embrace change while recognizing the things that are worth continuing and the things that need to be abandoned. Fixations and stubbornness are often stumbling blocks. A refusal to adapt and a rejection of new things will surely see your demise. Leave your ego at the door. Try something new. Don’t be stubborn and try breaking down a brick wall with your head. After the first strike, you realize it’s not going to work, but you keep going down the path to self-destruction. The trick here is evaluation. Is it working, or not? If, after a few tries, it’s not working, try something new. Change isn’t all bad, and you might be surprised how well something new will work. 3. Work ethic Your work ethic plays a major role in your survival mindset. Survival is hard work. When thrust into an emergency that requires hard toil. There is no place for lazy people and the family group cannot afford to carry them. Fortunately, a work ethic can be built up over time (if you survive your initial bout of laziness), and you’ll be wiser for the wear and tear. Experience is a hard but effective teacher, showing us the value of working harder next time. If you have a lazy person, a frank conversation to get them to pull their weight or a “pack your bags and leave” approach may just do the trick. To build a strong work ethic, you’ll have to learn to stick with a job until it gets done. Everyone should be working towards the same goal. You can address laziness but you could be hampered by factors beyond your control, like a physical injury, emotional distress or mental issues. Laziness can ruin your family
group’s work outcome so it must not be tolerated. This is where your
leadership comes into play. Survival is not a vacation. It is hard work and
everyone needs to contribute. If not, let them find their own way and do
their own thing. It means being honest with your workload, and each other,
and then getting it done. 4. Creativity Creativity and innovation will make adaptability a lot easier. In fact, innovation is the necessity of life.
So, learn from the kids and improvise. Humans make stuff. We make shelters, fire, tools, furniture outside toilets, and sometimes we even create our own problems. But this innate creativity usually benefits us, enabling us to devise ingenious solutions to our problems - in daily life and in emergencies. So, put aside your ego, listen to ideas, and do what needs to be done to survive. When you are in the back country, this is crucial. Again, be aware of your own mindset. A fear of failure can ruin someone’s natural creativity. This form of fear is different from normal fear (like being afraid of a dangerous thing). It may stem from childhood, when hyper-critical adults damaged your confidence. It may also arise from a reluctance to disappoint others or to admit that there are limits to your abilities. Whatever, build your own and other’s self-esteem and don’t fear failure. It’s all part of learning. When you see something that you can do and you think it might work, be confident and give it a try. Confidence can unlock your creativity, and creativity can save the day. 5. Positivity Because everyone says a positive mental attitude as a beneficial survival trait, it is. In fact, you should pay even closer attention to the attitudes of yourself and your family members. Positivity allows you to see the brighter side of things, and keep the mind going. There is nothing like negativity to deflate an already difficult and challenging situation. Positivity requires discipline and tenacity. Your positive attitude is vital to keep up morale. This upbeat attitude isn’t just handy when you’re lost in the wilds, you can use it every day. You need to be a “glass half-full” person, or an emergency situation will start to wear on you.
Pessimism or a “glass half-empty” attitude is a destructive viewpoint that will make any situation feel worse than it is and it will negatively impact your outcome. How can you cure pessimism? Develop an attitude of gratitude. Find the “silver linings” in your situation, and be truly grateful for them. Do you have air to breathe? Be grateful for it. Are you uninjured? Be glad about it. Even in the worst settings, you can find things that ARE going your way. If you’re grateful for them, it can change your whole attitude. 6. Acceptance When you’re in a tough situation, you just have to accept it. It’s easy to deny and resit the reality of a terrible situation of the revelation of a frightening truth, but this knee-jerk reaction is a mistake. Acceptance doesn’t mean that we like the circumstances around us or want them to continue. Instead, it means that we recognize their reality and understand that we can't change them right now, but we have to deal with it. Denial or putting it in the back of your mind will get you nowhere. Accept it and get on with it. 7. Humour Humour is a lubricant in difficult situations. It relieves stress and enables you to retain your sanity. Police officers, soldiers, firefighters and other folks in high-stress, life-threatening jobs sometimes use “gallows humour” to make fun of a life-threatening, disastrous, or terrifying situation to push through bad days. This grim sense of comedy was used by our ancestors as both a weapon and a shield. And it’s still used today. Most of our soldiers, police, firefighters, and EMTs know this type of humour very well. It helps them push through tough times and bad days. No, not everything is a joke, but there is some value in identifying irony where you can. When the space shuttle Challenger blew up, as it launched into space, jokes such as “the astronaut with blue eyes, one blew here and one blew there,” circulated. It made light of a terrible tragedy and, oddly enough, helped people deal with the horror of the incident. Even when someone is in the depths of depression, if you give them enough time and find the right approach, humour can be therapeutic. Satire, irony, and other forms of dark humour may be able to cut through the fog of stress and enhance their brain chemistry, recalibrating their pleasure-reward centre and lifting depression and anxiety. 8. Bravery How do we explain bravery? It’s not a lack of fear. Instead, it’s more like the conquest of fear. Fear and bravery are not opposites—in fact, they coexist. When a situation isn’t dangerous or frightening, there’s no need for bravery and no condition for it to exist. We have to be afraid before we can be brave. But, if we allow fear to overwhelm us, so that we’re too frightened to even think clearly, there’s no room for logic or bravery. There’s only room for panic – and this is dangerous to you and your family group. This fear response can be described as an unrestrained and all-consuming fear. It’s a common response in emergencies, and it can manifest in several ways. You may engage in frantic behaviour or be frozen in fear. You may even become overwhelmed by emotion, screaming or crying inconsolably. Any of these responses could get you into more trouble, and then you’ll have a whole new set of problems. But if you can use your fear as a tool and hold panic at bay, then you’ll be the master of your fear, and not the other way around. I am reminded of Rudyard Kipling’s poem “If”, which says, “If you can keep your head when all about you are losing theirs… …then you will be a man my son.” Accept your fears. Fear is our natural instinct to avoid dangerous things, and it keeps us out of harm’s way. If you can own your fear and keep it under control, it will start working for you. 9. Motivation Motivation is one of the most powerful forces in the universe. It is behind everything successful and absent from everything that is a dismal failure. So, what motivates a person to stay alive when everything has gone wrong? Many survival stories speak of the survivor’s faith in God and Jesus Christ, or to some other higher power that motivated them and gave them hope. Other survivors have told of their intense desire to get back to family, friends, and loved ones. What would motivate you to stay alive, and keep your family members alive, in a survival emergency? It’s different for every person. Hopelessness
is the kryptonite to your superpower of motivation. When a person loses hope that they will survive and recover, returning to normality, their desire to keep going begins to dwindle. When a person believes that God has abandoned them, hope dies another death. But if you are trying to survive Armageddon it’s because you didn’t believe in/accept God in the first place. The point is you still can. You should and must accept Jesus Christ as your saviour and your motivation should be to stay alive, away from the antichrist and his cohorts, live as Christian life as possible, praying for your safety and that of your family group and making sure that they too choose Jesus Christ so that if you oy they die, you and they will go to Heaven and not Hell. In short, this is what should be your primary motivation. Dig deep. Keep thinking about the people and things you value most. It may take a combined effort from many facets of your survival mindset to keep you on the path to survival. A positive attitude and tenacity will help maintain your will to live and the need to avoid the antichrist at all costs. Having faith in God, and through His grace, you may find yourself surviving Armageddon and the Great Tribulation because there will be a thousand years of peace on earth after Jesus Christ returns. This is your hope. Bugging out is a serious decision In the Book of James 1:5-6, it says, “If any of you lacks
wisdom, let him ask God, who gives generously to all without reproach, and it
will be given him. But let him ask in faith, with no doubting, for the one
who doubts is like a wave of the sea that is driven and tossed by the wind.” Your home is always the default choice of where to ride out an emergency — you would only bug out if the merits of leaving overruled that stay-at-home default e.g. to escape
the clutches of the antichrist. That means you have to prep for both staying at home and being away from home. If you can only handle one or the other, you are not prepared. Even so, bugging out is a serious decision, and not one to be made lightly. There needs to be good cause for you to up and leave home and flee.
Quite simply, it means a SHTF situation. What is a SHTF situation? The acronym SHTF stands for “shit hits the fan” and is used when referring to a situation that goes from bad to worse. What are the first things to do when SHTF? ·
Communicate
with your loved ones, either by cell phone or walkie talkies. ·
Get
everyone home. ·
Make
sure your home is secure and defensible. ·
Assess
the situation. ·
Decide
whether to stay or go (hunker down or bug out). First, if the Rapture has occurred (you will know) and you are left behind, you have to bugout without waiting. It’s important to realise that one or more of your family members may have been raptured. As Jesus said in Matthew 24:40-41, “Two men will be in the field: one will be taken and the other left. Two women will be grinding at the mill: one will be taken and the other left.” That is why the rule of a set time for reaching your rally point prior to bugout must be observed without, emotion, ifs and buts. When the rioting begins, and it will happen Between 9 and 18 July 2021, violent and widespread unrest occurred in the KwaZulu Natal and Gauteng provinces of South Africa. This unrest was triggered by the imprisonment of former President Jacob Zuma for contempt of court. Resulting protests against the incarceration triggered wider rioting and looting, much of it said to be undertaken by people not in support of Zuma but fuelled by job layoffs and economic inequality worsened by the COVID-19 pandemic. A total of 354 died and R50 billion in damage was caused. The police and defence force did nothing for three days, in which time the rioters were left to cause mayhem. And, as the rioters moved onto a suburb, residents stood their ground to defend their homes. Of the thousands of rioters, 33 were killed by residents of the Phoenix suburb. The Police and defence force, once they arrived on scene, finally quelled the violence and looting. As in this case, the decision to bugout would have been a wrong decision. Societal collapse, in the broader sense, as in the Kübler-Ross model, ties each of the five collapse stages to the breaching of a specific level of trust, or faith, in the status quo. Although each stage causes physical, observable changes in the environment, these can be gradual, while the mental flip is generally quite swift. It is something that nobody (but a real fool) wants to be the last fool to believe it isn’t happening. The five stages of collapse are: Stage 1: Financial collapse. Faith in “business as usual” is lost. The future is no longer assumed resemble the past in any way that allows risk to be assessed and financial assets to be guaranteed. Financial institutions become insolvent; savings are wiped out, and access to capital is lost. Stage 2: Commercial collapse. Faith that “the market shall provide” is lost. Money is devalued and/or becomes scarce, commodities are hoarded, import and retail chains break down, and widespread shortages of survival necessities become the norm. Stage 3: Political collapse. Faith that “the government will take care of you” is lost. As official attempts to mitigate widespread loss of access to commercial sources of survival necessities fail to make a difference, the political establishment loses legitimacy and relevance. Stage 4: Social collapse. Faith that “your people will take care of you” is lost. As local social institutions, be they charities, community leaders, or other groups that rush in to fill the power vacuum, run out of resources or fail through internal conflict. Stage 5: Cultural collapse. Faith in the goodness of humanity is lost. People lose their capacity for “kindness, generosity, consideration, affection, honesty, hospitality, compassion, charity” (Turnbull, The Mountain People). Families disband and compete as individuals for scarce resources. The new motto becomes “May you die today so that I die tomorrow” (Solzhenitsyn, The Gulag Archipelago). There may even be some cannibalism. The author, in analysing South Africa and developing a bugout decision model, using the Kübler-Ross model, concluded that every society has periods of prosperity and hardship, but when there is a decline from the height of civilization, as dramatic as we have seen in South Africa, we can safely say that the country is on the precipice of collapse. The decision model scored South Africa (at the time of
writing) at 82%. At 90% the warning bells will ring and at 95% it’s time to bugout. Other countries may find themselves in a similar position. And, at the same time, on the international front, Russia and NATO are at loggerheads over Ukraine and the USA, with its allies, are at loggerheads with China over Taiwan and the South China Sea. Nuclear war in the Northern
Hemisphere will impact South Africa economically and thrust the country into
societal collapse. We would then see a scale of violent anarchy on a national
scale making KZN look like a picnic party. This would mean bugging out and
not waiting. And, when the antichrist takes control, you won’t want to be where he and his cronies can get to you. The defence readiness condition (DEFCON), an alert state used by the United States Armed Forces, and NATO, was developed by the USA Joint Chief of Staff and prescribes five graduated levels of readiness (or states of alert) for the U.S. military. These are:
So, quite simply, if we hit 95% on the Kübler-Ross model or Defcon 1 on the DEFCON model, or the antichrist reveals himself, it’s time to bugout – to a destination. Planning your plan Your bugout plan should include the following: ·
Have an
alternate destination ·
How to
get there ·
Preparing
for your bugout ·
How to keep
communications open in getting there ·
How to
start a fire when you get there ·
How to
build a shelter if you don’t have a tent or caravan ·
How to
dig a latrine ·
How to
create and maintain a food cache ·
How to
build a camp kitchen ·
Where to
get your water, safely and securely ·
How to
establish a vegetable garden ·
How to
protect your crop ·
When
and how to harvest your vegetable ·
When in
your bugout destination, know when to say when, if ever needed Physical and mental limitations Most people do not have physical disabilities that will hamper them when the time comes to bugout arrives. It will be very challenging for small children, pregnant women, elderly individuals, and those who are physically or mentally challenged. However, they may be perfectly able to travel by vehicle to a well-stocked bugout location. Don’t forget to include these folk in your plans. Plan for Pets Many pets are like family members. You can’t just leave them behind to starve so include your pets in your bugout plan, especially food. Don’t forget spot-on treatments for ticks and fleas. Medical challenges In a bugout situation, because of a natural or manmade disaster, one of your family group may have sustained an injury. In a disaster situation, injuries are likely and if this is the case, that person will need medical assistance. This is a really tough one. Getting medical help may not be possible. Transporting the individual to the nearest modern hospital, clinic or emergency care centre, which also may not be possible, is the best solution. However, if you are a trained medical professional, do what you can. Otherwise, find someone who is a medical professional and handover the patient to their care. If not, apply first aid. First aid is the initial assistance or treatment given to a person who is injured or taken ill. Providing first aid gives you tools to prevent the situation from becoming worse. In some situations, if a patient doesn't receive basic first aid care immediately their situation will deteriorate – often rapidly. By being able to provide basic care you can stabilize a patient and give them a better chance of survival. Do unto them as you would have them do unto you. You can buy these books from https://www.takealot.com or
https://www.amazon.com:
Critical to providing first aid is to understand your own abilities and limitations, to stay safe and calm at all times, to assess a situation quickly and calmly and summon help if possible, to assist the casualty and provide the necessary treatment, with the help of others if possible, to pass on relevant information to medical professional or the person who takes responsibility for the casualty and most importantly, to be aware of your own needs. If professional medical help is not available, and you are out there in the wilds, you will be the first aider. So, whatever you do, download the first aid manual above and keep it in your bugout kit. Once again, your mindset is crucial. You should at all times remember the “Three P’s”, the primary goals of first aid: ·
Preserve
life: Do what you can to save the person’s life ·
Prevent
further injury: Do what you can to keep them from sustaining further injuries ·
Promote
recovery: Do what you can to help them heal These goals might seem overly simple, but they’re simple on purpose. When someone is injured, it’s all-too-easy to panic and forget about what you need to do to provide assistance. The Three P’s are reminders of the very basics of what needs to be done. 1. Check the scene for danger Before you provide help to an injured person, it’s important that you check the immediate area for danger. You don’t want to get yourself injured, too. This isn’t a cowardly precaution. The fact of the matter is this: if you get injured, you won’t be able to help someone else who’s injured. So, before you rush to help someone, take a moment to analyse the area and spot anything that could injure you. As it says in the Book
of 1 Peter 5:8, “Be alert and of sober mind. Your enemy the devil
prowls around like a roaring lion looking for someone to devour.” 2. Treating Cuts and Scrapes Blood is a vital component of our bodies. When someone is bleeding, you want to prevent as much blood from leaving their body as possible. Follow the instructions in your first aid manual. 3. Treating sprains Sprains are usually an unalarming injury, and most of the time they’ll heal on their own. But there are steps you can take to ease the swelling. Swelling is caused by blood flow to an injured area. You can reduce swelling by applying ice. Ice restricts the blood vessels, which reduces blood flow. Your first aid manual will instruct you on exactly what to do. And, just in case, pack a crutch. Someone with sprained ankle or broken leg will need one. If you forget, you can fashion a crutch from a small, thin tree, roughly 4cm in diameter, and of the right length. At the top there should be a “Y” split, which will be tucked under the arm. 4. Treating heat exhaustion Heat exhaustion occurs due to prolonged exposure to high temperatures, especially when the person is doing strenuous activities or hasn’t had enough water. To treat someone with heat exhaustion: ·
·Refer to the First Aid Manual. ·
Get the
person to a shaded area that’s out of the sun. ·
If there
are no shaded areas available, keep the person covered by any available
materials that can block sunlight. ·
Give
the person water and keep them hydrated. ·
Place a
cool cloth on their forehead to lower their body temperature. 5. Treating hypothermia Hypothermia is caused by prolonged exposure to cold temperatures. It begins to occurs when your body temperature drops below 95 degrees Fahrenheit or 35 degrees Celsius. To treat hypothermia: ·
Refer
to the First Aid Manual. ·
Be gentle
with the afflicted person. Don’t rub their body and don’t move their body in
too jarring of a way; this could trigger cardiac arrest. ·
Move
the person out of the cold, and remove any wet clothing. ·
Cover
the person with blankets and use heat packs. Don’t apply heat directly to the
skin because this could cause major skin damage. ·
Give
the person warm fluids. If you set the person on the ground, be aware that the ground may also be a cold source. Place warm materials on the ground that the person is going to lay on. 6. Treating Burns Before you apply treatment to burns, you need to identify the burn type and the severity of the burn. There are four kinds of burns: ·
First-degree
burn: Only the outer layers of skin are burnt. The skin is red and swollen,
and looks similar to a sunburn. ·
Second-degree
burn: Some of the inner layer of skin is burnt. Look for blistering skin and
swelling. This is usually a very painful type of burn. ·
Third-degree
burn: All of the inner layer of skin is burnt. The wound has a whitish or
blackened colour. Some third-degree burns are so deep, there might not be any
pain because the nerve endings are destroyed. ·
Fourth-degree
burn: A burn that has penetrated all tissues up to the tendons and bones. Whatever you do, refer to the First Aid Manual. 7. Allergic Reactions Allergic reactions occur when your body is hypersensitive to a foreign substance. Bee stings, certain foods, or drug ingredients can cause allergic reactions. Anaphylaxis is a life-threatening allergic reaction that can be caused by all of those mention allergens. If someone is suffering from an allergic reaction: ·
Keep
the person calm. Ask if they use an EpiPen and have one with them. ·
Have
the person lie on their back. Keep their feet elevated 12 inches. ·
Make
sure the person’s clothing is loose so they’re able to breathe. ·
Avoid
giving them food, drink, or medicine. ·
If
appropriate, learn how to inject an EpiPen in someone having a reaction. ·
Wait
5-15 minutes after using an EpiPen. If the allergic reaction isn’t subdued, a
second dose may be required. The top antihistamines (you should have in your first aid kit): Epinephrine. A Epinephrine injection is used for emergency treatment of severe allergic reactions (including anaphylaxis) to insect bites or stings, medicines, foods, or other substances. It is also used to treat anaphylaxis caused by unknown substances or triggered by exercise. Cortisone: Prednisone is used to treat conditions such as arthritis, blood disorders, breathing problems, severe allergies, skin diseases, cancer, eye problems, and immune system disorders. Fexofenadine
(Allegra) (Fexo):
It's used to treat hay fever, conjunctivitis (red, itchy eye), eczema, hives (urticaria), reactions to insect bites and stings and some food allergies. Fexofenadine is known as a non-drowsy antihistamine. Loratadine
(Alavert, Claritin): It’s used to treat symptoms such as itching, runny nose, watery eyes, and sneezing from "hay fever" and other allergies. Diphenhydramine: It is used to relieve symptoms of allergy, hay fever, and the common cold. These symptoms include rash, itching, watery eyes, itchy eyes/nose/throat, cough, runny nose, and sneezing. It is also used to prevent and treat nausea, vomiting and dizziness caused by motion sickness. Diphenhydramine can also be used to help you relax and fall asleep. 8. Treating Fractures Sometimes it’s very easy to tell if someone has suffered a fractured bone. But sometimes it’s not. If you suspect someone of having a fracture, and have access to medical help, don’t try to straighten a fractured limb. Read the First Aid Manual. Remember, people heal at different rates depending on age, general health, and the extent of the injury. A fracture may heal in as little as four to eight weeks or it may take months. In general, approximately 3 months is required for bones to heal after a fracture. Chronic medical conditions, advanced age, or severe injuries may cause a longer recovery period. BEWARE: Always check the expiry date. Seven years is a
long time so once your meds have past the expiry date you will need to be
extra careful., especially someone allergic to bee stings. 9. Performing CPR CPR stands for cardiopulmonary resuscitation. CPR is used to restore breathing and blood circulation to an unresponsive person. It is an incredibly important procedure that can save lives. But learning CPR is an intensive procedure that requires some knowledge and training. Read the First Aid Manual. Time will be of the essence if you wish to save someone, so read the First Aid Manual now. Prepare yourself with the right medical gear The methods listed above are not very difficult to do and they don’t require medical training—but they can save someone’s life or prevent an injured person from sustaining serious injuries or infections. Make sure that your stash of survival gear includes a first aid kit, and be sure to refill your first aid kit every year as its supplies dwindle or expire. Table: The essential first aid kit should include:
You should also have the following: ·
Splint: You could easily make a splint with a
branch. However, there are times when you need a smooth, “L” shaped splint.
So, pack one. ·
Triangle
Bandage: While triangle bandages
are useful things like making a sling or as a broad-fold bandage, you can
also just use your shirt. But, if you bugged out with just one shirt, pack a
triangle bandage, or two. ·
Scissors: Scissors in your multi-tool will not
always be suitable, so pack a pair. ·
Magnifying
Glass: This is useful for
cleaning wounds and could also be used as an emergency fire starter. ·
IV Kit: This only makes sense if you are a
trained medical professional. If you
are not confident with using an IV kit, don’t pack one in your kit. ·
Band-Aids: When hiking, I just put a piece of
medical tape over small wounds to keep out debris. In a bugout situation, it
should be the same. ·
Wound
Irrigation Syringe: It
would be very useful and possibly life-saving for cleaning wounds, but it
also doesn’t seem like an absolute necessity since I could use water/cotton
balls/tweezers to clean wounds. Identifying a bugout destination, and an alternate destination Once the initial reactions to a disaster subsides, people can experience a variety of thoughts and behaviours. Common responses can include Intense or unpredictable feelings, anxiety, nervousness, a feeling of being overwhelmed or grief-stricken and yet others in seeing it as an opportunity to rape, murder and pillage. It’s during this time, which may take hours or days, that you need to react and fast. You have to be in control and organise your family members who may be negatively impacted by the disaster and in shock. At most you have a two-to-three-hour window to get out of your city or town, appreciating the fact that by the time you get to the next town or the next, roadblocks may have been set up. You will need to use backroads. The key aspects to figuring out your bugout destination involve: The distance from your home to your bugout destination. The longer the distance the greater the risk of running into trouble along the way. It should be away from densely populated areas and in a least likely position to invoke the interest of the antichrist’s henchmen. It may even require choosing an off-grid location away from roads, paths or railway tracks. Darwin’s “survival of the fittest” will be in play. Your bugout location should be safe, secure and defensible. Try to get sufficient tree or rock cover, preferably in or near a forest or mountainous
area. Trees provide material to build a shelter and fuel for a fire. Trees dissipate
smoke from a fire, but not entirely. There should be an adequate supply of water nearby. It should be a place that will sustain you for an extended period of time, which means you will need to grow and harvest vegetables. In bugging out, you should have three months of food. As soon as you get to your bugout destination, within 72 hours, you will need to plant your vegetables as these will need three months to grow. And, as you cannot afford to lose your harvest, choose your bugout destination well. Bugging out during (or before) a disaster is never a cool adventure. Plotting your route to get there In a disaster situation, cell phone communications will probably not be available. This will mean Google Maps will not be available. So, a hardcopy map covering the area from your home to your bugout location is critical. The more detailed the better. Depending on how quickly you mobilise after a disaster, main routes will, in all likelihood, have road blocks. This means finding a route to your bugout location via backroads, which also means you will need adequate petrol to get you there, and beyond if necessary. This may require having a cache somewhere on route that you planted some time before, or extra in a trailer. You should always have contingencies in place, be cautious and on the lookout, constantly looking ahead of you.
Avoid poor areas. It does not make them any lesser humans but they will not have had the where withal to prepare for any disaster. And, as the rule, “survival of the fittest” will be in force, it will be better to avoid these desperate people. Rather take a detour than take a chance or force your way through a particular area. Caution is the better part of valour. Safety first! Remember, the lives and well-being of your family group is in your hands. However, balance caution with optimism, and an eye for opportunity. And remember, two heads are better than one. The distance from your home to your bugout destination may be beyond the range of one tank of petrol or diesel. In which case, you will need to put together an emergency cache and bury it somewhere where no human or animal is going to find it. You will need to keep food separate from your fuel, which should be enough to get you another 500 kilometres further and to your bugout destination.
Here are a few caching tips and tricks: ·
Use a
largish, thick-walled plastic container/mini-drum with a screw on cap to seal
it tight. ·
Only
cache non-perishable items such as tinned and freeze-dried foods with lengthy
expiry dates. ·
Be
absolutely sure you can find the cache when you need it. ·
Bury it
deep enough to keep the local wildlife from sniffing out your cache. ·
Add an
unopened bottle of liquor/alcohol to the cache. It serves as a great
steriliser and anaesthetic. ·
Throw
some basic tools and utility items in the cache alongside the food such as a
decent Swiss penknife or a Leatherman multi-tool, a roll of paracord (ten
metres), an emergency poncho, a small magnifying glass or BIC lighter, a
small torch (with a spare battery), 1,500ml water and a couple of energy bars
(e.g. nuts etc). ·
Periodically
check your cache and replace compromised items. Remember, this could be as
far as 700 kilometres away. So, plan carefully. Of course, if you belong to a larger group, a convoy can be both helpful and a hinderance. With there being strength in numbers, any opportunistic individual or group will have second thoughts about taking you on. Then again, you won’t miss spotting a convoy. In 1976, with South African forces withdrawing from Angola, and in fighting a rear-guard action, we provided protection for a convoy of Portuguese refugees fleeing the country. Convoys can be useful but unless you belonged to a pre-disaster survivalist/prepper group or you are brought together with other people who face the same risks and challenges as you do, stick to your plan. And, in speaking about “sticking to the plan”, unless absolutely unavoidable, stick to your plan. Preparing for your bugout How do you prepare for bug out? If you are organised, you will have a bugout bag in each car, have your home setup to enable you to survive at least three months and a trailer loaded with weapons, tools, shelter, food, water and fuel to enable you to get to your bugout destination and survive for three months while your vegetables grow. Why should you have a bugout bag? Disaster can strike at any time. The negative impacts of climate change such as floods, heatwaves, Russian and Chinese aggression, war, solar flares, earthquakes and volcanoes, failed economies, etc. can affect you at any time. Your BOB (bug out bag) should be able to sustain your survival for at least 72 hours in a SHTF scenario so that you can get home to your family group. Bugout bag (BOB) Preparing a comprehensive, survival-ready bug out bag should be priority number one on every survivalist’s checklist. So, what goes into a bugout bag? At its core, a bug out bag is a survival kit filled with essentials that can help you get through a variety of emergency scenarios. If you look on the Internet you will find differing opinions on what should be in a bugout bag – 29 items, 50 items, and so on. A fit man can carry one third of his body weight. A less fit man and a fit woman, one quarter of their body weight. For older men and less fit women, preferably less than 12 kilograms. Don’t bank on your car getting you home so that you don’t have to carry your bugout bag. Anything can happen. Be prepared to carry it yourself, for at least 48 hours, or more. Line the pack with a strong, waterproof bag or pack liner. If bright orange, it can be used to signal, if needed, in an emergency. Put bulky, lighter items in first, including your sleeping bag. sure that your pack is well-balanced and positioned as close to your body’s centre of gravity as possible, i.e. close to your back. Pack spare clothing in waterproof bags. Pack heavier items close to your back and higher up in your pack. Do not pack sharp objects close to your back. Ensure that waterproof and warm garments are easily accessible. Pack the side pockets before the main body. Ensure the following can be reached instantly: First aid kit, waterproof poncho / jacket, survival bag, whistle, torch, compass / GPS, map, water bottle, cell phone. If the pack is not full, use the compression straps to hold the load tightly and prevent backpack sway, which causes fatigue. Load the pack before fitting it on, in order to achieve a realistic fit. Loosen all straps, put your arms through the shoulder straps and mount the pack onto your back. Secure the hip belt around your waist, adjusting it so that it rests on top of your hip bones. Then tighten the shoulder straps. Last but not least, make sure you have a rain cover for your pack. Dry is better, wet is awful. So, what should go into your bugout bag? First and foremost, some sort of a defensive weapon, not just pepper spray. Respirator masks, 3M 8511 and 3M 8210 disposable N95 respirators. Then you will need a Mylar emergency shelter and sleeping bag. Alternatively, a 2m x 3m tarpaulin, groundsheet and a rated -2 degrees Celsius sleeping bag. A space blanket. A change of clothing, including something warm (ladies pantihose work wonders), socks and jocks. A hat or cap. A windproof/waterproof jacket. Gloves. Toiletries, especially a toothbrush and toothpaste, soap and small towel. A brush or comb. Sunscreen and lip balm. A first aid kit. A flashlight/torch with spare batteries. A good knife. A good multi-purpose tool. 30m x 2,6mm black nylon rope. 30m x 10mm climber’s rope. Map, compass and route plan to get you home. Binoculars. Camping gas stove, pot, plate, knife, fork and spoon, and a mug. A cigarette lighter or waterproof matches. A can opener. At least three litres of water, water purifying tablets and isotonic powders. Food, enough for three days. As to what food, I suggest you consider the following:
You might be prepared for a disaster, but is your family? Only 39 percent of people surveyed have developed an emergency plan and discussed it with their household. Take the time to prepare your loved ones for a potential disaster and create a plan that can help you all get to a place of safety. You should also have a copy of your family disaster and preparedness plan with you, and have the ability to communicate with them – such as a cell phone and a walkie talkie with an adequate range. Your plan should also cater for all possible contingencies, for each of your family members. As we have all experienced, Murphy loves to put a spoke in the wheel. Your bugout trailer A bugout trailer or survival trailer is an extension of your bug out bag, just for a longer period. It's a storage unit on wheels. Typically, a bugout trailer will carry extra supplies in the form of water, food, gear, tools, etc. Ideally, they are mobile, easy to manoeuvre, and lightweight. Not everyone can afford a good safari trailer with a mounted tent system. Even a luggage trailer can cost you a pretty penny.
For purposes of illustration, I will use the following trailer specifications (courtesy of Venter Trailers). These trailers are robust, reliable and have been used by many people over the years. If you cannot afford a new trailer, buy a good second-hand trailer. If you do, make sure you change the bearings, and keep the old ones as spares, or buy an additional set of new bearings. And, make sure your spare wheel is pumped to the right pressure, and you have a puncture repair kit, and a compressor to pump up a flat tyre. Trailer specifications
Packing your trailer could look something like this:
·
Be sure
not to overload your trailer. ·
Mount
Gerry cans on the outside using properly made mounts as in the image to the
right. ·
Be
aware of the weight you will be carrying and the terrain you will be
travelling over. Especially corrugated dirt roads. ·
Balance
the Load: Achieving the right balance in weight distribution is critical for
off-road towing. ·
Pack
heavy items low and towards the front of the trailer to prevent swaying. This
will enhance stability on uneven terrains. ·
Tyre
Pressure Matters: Adjusting your tyre pressure according to the terrain is
crucial. Lowering the pressure provides better traction on sandy or rocky
surfaces, while higher pressure is suitable for highway driving. ·
Carry a
portable air compressor for on-the-go adjustment What on earth do we want pool noodles for? Made from polyethylene foam, they float, and can be most useful in a number of water applications. And, if you can, obtain an inflatable rubber dingy that can carry at least two people, and don’t forget the oars, or a motor if one can be fitted. Due to their portability light weight, inflatable boats/rubber dinghies are used in many diverse roles. Easy to launch, easy to handle, inflatables are designed to handle any type of water -- from shallow saltwater flats to lakes, rivers, and even the roughest of ocean swells! They are highly manoeuvrable and nearly unsinkable, and durable enough to withstand just about anything you throw at them. So, in true Boy Scout tradition, with their motto “Be Prepared”, be prepared for anything. Which brings to mind that you should have at least 60 metres of proper climbing ropes, the standard for mountain climbers, with at least four carabiners. If you have to ascend or descend a mountain cliff, a rope provides a little safety insurance. However, if you are not an experienced mountain climber, only do so in an emergency situation, and be very careful. Whether boating, climbing or camping, there are seven essential knots that will serve you well. Even if you have no intention of sailing the ocean blue or climbing a mountain, having a repertoire of knots at your disposal is a smart, prepared thing to do. These seven essential knots should be known by heart and be able to use them without thinking. When you need a knot for a specific reason, for whatever the purpose may be – tying something down, hoisting something up, or any of a thousand other random reasons being able to tie the right knot at the right time is critical for any prepper. In the trailer’s cone you should have a set of spanners, screwdrivers and pliers, and ropes. A spare wheel spanner, a spare jack, tow ropes, jumper cables and 20 litres of petrol, and of course your trailer’s spare tyre. As already mentioned, you should have a puncture repair kit and a small compressor that works off your car battery, directly or via your car’s cigarette lighter (if it has one). And, just in case, you should also have five litres of oil, an oil filter, air filter, petrol filter, a set of four long life spark plugs and a set of brake pads, as well as a fan belt and a spare rubber hose for your radiator – just in case. In the trailer itself, you should have seven polypropylene storage boxes. Three 65 litre boxes with lids and four 110 litre boxes, also with lids. When you are absolutely sure you have everything, you can duck-tape them for added sealing and protection from water ingress and/or bugs. With space being a premium, and as your wife or girlfriend would like, you cannot take the kitchen sink with you.
You should have one box for medical, a box for tools and all sorts of gadgets, a portable toilet, a bigger box for kitchen things and three boxes for food. Along the one side you can store your weapons, tent and water. On the other side, you will need to store your collapsible portable toilet, toilet paper and pool noodles. Between the boxes you should be able to store your rubber dinghy. And, on top of all these boxes, your oars and an extendable swimming pool pole (to hold up a tarpaulin). Medical box In your medical box you should have a well-equipped medical kit and a burn kit. We covered medical quite extensively earlier. In addition to these items, don’t forget your chronic medication. If you are on this type of medication, you should have pre-planned and obtained from your doctor an additional six-month script which, if you are on medical aid, you will have to pay cash for and then rotate out against your normal chronic medicine supply so that your emergency supply remains fresh, has an extended life and remains within the expiry dates. Things that may not be in your medical kit is a thermometer, disinfectants (e.g. Savlon, Quicksan), medicinal creams (e.g. Mylocort, Supiroban) and gels (e.g. MSM and Arnica Ice), painkillers, flu tablets, eye drops, ear drops, antacids, nausea pills and so on. While all of this will cost a pretty penny, you will not regret the expenditure, should the need arise, especially when you are in the bush. Remember, if you are a doctor or dentist or have one in your immediate family group, lucky you, because they won’t be a phone call away. Toolbox Turning to your toolbox, the ability to start a fire and build a shelter are paramount, especially the latter if you don’t have a tent, or even a tarpaulin, which would be very stupid. But life happens and it’s not the end of the world! First and foremost, a fire-starter kit comprising waterproof container, BIC lighters, waterproof matches, magnesium flint and striker, candles, cotton wool and petroleum jelly. Secondly, you should have a two types of wood saws – a hand saw and a bow saw. A hacksaw, with spare blades, to cut metal is also a prerequisite. A good axe and a machete are next on the list as is a sheath knife and a multitool (on your belt). These are tools you don’t need until you really do, which is why it’s essential to keep them around. For the rest of your toolbox, there are different types of hand tools that you should include such as a tape measure, hammer and nails (100 mm), twine, various lengths and thicknesses, utility knife, protractor, square, ruler, level, army issue shovel, clamps, Allen key set, adjustable wrench, cutting pliers, needle nose pliers, locking pliers, staple gun, various size wood screws, a flashlight with spare batteries and a pair of workmen gloves. In speaking of gloves, you will need a few pairs of rubber gloves and protective eyewear for working with corrosive chemicals. Portable toilet The one thing you should not forget is a portable toilet. Invariably, in the family group, you will have an elderly person who, for medical reasons, is unable to squat. Secondly, most portable camping toilets have a weight limitation of 120 kilograms. So, if you have an overweight person in the group, you will need to build a portable toilet to carry at least 150 kilograms. You can build a frame from 2.5mm by 2.5mm square B-grade steel tubing, at least 45cm high, fit a normal toilet on it and place under it a suitably sized polypropylene storage box using disposable plastic bag liners to collect the waste for later removal and burial. DO NOT JUST DUMP the waste on the ground somewhere. ALWAYS BURY IT. While in use, use Walex Porta-Pak, or similar, odour control sachets with a fresh lavender scent. These pre-packaged water-soluble and biodegradable sachets dissolve quickly, controls odours, breaks down waste and paper. Or you can use caustic soda. This is a nasty chemical that can burn, but it's very effective for disinfecting toilets. To use this chemical, you need to have rubber gloves and eye protection. You can buy the chemical from your local hardware store. When not in use, cover the toilet with disposable plastic 750mm by 750mm dustbin bag. This will keep the flies out and smell contained. Your family group need to understand that you are in the sticks so the niceties of a flush-toilet will just not be there. And, all capable family members will need to take turns to dig a burial hole for the disposable human waste. Kitchen box Your kitchen box should contain a single plate gas stove with spare gas bottles, a kettle, a pot, a frying pan, tin opener, a kitchen knife, ladle, egg lifter, large spoon, knife/fork/spoon set for each member of your family group, a plate, bowl and mug for each member. And, always carry the same for a guest, or two. A steel braai grid will always be useful so don’t forget to pack one. Also pack a spare camping gas stove with extra canisters. Important too are cleaning materials such as dishwash liquid, pot scourers and drying cloths. And don’t forget the gas lighters and waterproof matches plus the other fire starter tools mentioned under toolbox. PEGS ALUMINIUM FOIL SUNLIGHT SOAP etc Food boxes 1, 2 and 3 First and foremost, water is critical for survival, in both the short- and the long-term – for human consumption and for growing vegetables. You should have at least 15 litres per person in your trailer and/or boot of your car to last three days. In your kitchen box, you should have packed water purification tablets for at least 100 litres per person. Remember that boiling water is also an excellent method of purifying water. Just filter it before and after boiling to remove any floating debris/waste. Secondly, know what foods your family group members can and can’t eat. Knowing their allergies to gluten, dairy, preservatives such as sulphur dioxide and so on is absolutely crucial. And, just in case, pack antihistamines such as Prednisone, Fexo 120 or 180, Allerway Five or Benadryl. People die from untreated allergies. And, in speaking of allergies, keep a few Celestamine handy. You will need food to provide, as a general rule, a minimum of 1,200 calories per day per person for three months in your trailer to stay healthy. Having breakfast, to start your day, is critical. You can snack at lunch but should have something meaty (protein) and veggie (carbohydrate) at dinner. Dr Michael Lange, certified nutrition specialist, CEO and chairman of Fortifeye Vitamins, radio talk show host, and extreme sports enthusiast, created the Lange Survival Diet to help people survive longer and decrease their chances of developing chronic disease through proper foods.
In a survival situation, avoiding chronic diseases is paramount. Here is the list of Dr Lange’s safe foods: Vegetables: Mustard greens, organic kale, organic lettuce, organic cucumbers, bock choy, Broccoli, turnip root, cabbage, yellow and orange bell peppers, bamboo shoots, water chestnuts, pickled vegetables, fermented cabbage (kimchi, sauerkraut), organic boiled spinach, 1/2 avocado, 3-4 brussels sprouts, garlic, mushrooms, onion, garlic, asparagus, artichoke.
if you have IBS stay away from garlic, onions, mushrooms, asparagus and artichoke) If you have high blood pressure, or any heart conditions like atrial fibrillation, atrial flutter or other heart rhythm issues stay away form pickled or fermented food that are high in sodium. Fruit: Pineapple, banana, lemon, lime, organic blueberries, organic strawberries, organic grapes, cantaloupe, orange. Protein: Organic free-range eggs, organic grass-fed beef or bison, organic turkey, organic chicken, ostrich, wild game, wild salmon, sardines, anchovies, rainbow trout, albacore tuna, goat’s (milk, cheese, butter, yogurt or kefir), Sheep (milk, cheese, butter, yogurt or kefir), A2 cow’s milk, cheese or butter (has A1 β-casein milk protein, a primary dietary trigger for diabetes removed) has grass fed whey isolate or concentrate. Nuts, seeds, oils, spices, flour and beverages: Macadamia nuts, chestnuts, coconuts, cashew nuts (cashews are healthier if soaked overnight or sprouted to reduce the lectins and phytic acid), pistachios, walnuts, pumpkin seeds, hemp seed, sunflower seeds ( sprouted seeds are healthier than non-sprouted),
coconut oil, algae oil, olive oil, apple cider vinegar, malt vinegar, wine vinegar, spring water, coffee, herbal tea, cashew milk , goat or sheep milk, A2 cow’s milk, pink sea salt, Celtic sea salt, white pepper. Organic Amaranth Flour, organic Quinoa flour, organic Buckwheat flour and organic Coconut flour is ok 3 times a week. Pseudo-grains: Organic De Hulled Quinoa, Organic Buckwheat and Organic Amaranth.
These Pseudo cereals are allowed 3 times a week only if they are washed, soaked and preferably sprouted. Boiling and fermenting of these pseudo grains further reduces the anti-nutrients. These 3 grains are gluten free but do contain 4 anti-nutrients: Lectins, saponins, protease inhibitors and phytates. As no two groups of people are the same, or having the same preferences, advising you what you should pack in your bugout trailer would be wrong. But, if you take the time to plan your meals to ensure you have a balanced diet, for everyone, you will gain the health benefits with none of the negative side effects. This being said, you will need to store enough food for three months without it going off. The best ways to preserve food is canning, freeze drying, storing in air-tight containers (jars, plastic containers and vacuum sealed mylar bags). When buying food look at the expiry or best before date. Buy packaged foods with the longest expiry dates. Work out a menu for each day for each person for three months, keeping in mind allergies. Pack your menu for each month in a 65 litre or bigger (if you can get it into your trailer) polyethylene storage box with sealable lid. You don’t want insects crawling into your food. But why three months of food? That’s the bare minimum. You should have packed a variety of vegetable seeds. When you get to your destination you will need to plants your seeds immediately as they take 90 days to harvest, some a little longer. This means you need to choose your destination well. Reasonable soil, enough water and sunshine. Odds and ends Because of the way trailers are designed, their width and side curvatures, you should have space available on each side of your side-by-side polypropylene boxes. In these spaces, you can fit a whole host of things you were not able to fit into your boxes. Additionally, the curved lid of your trailer allows you to store other odds and ends on top of your boxes, such as toilet paper, telescopic poles for rigging your tarpaulin, oars for your inflatable dingy that you have stored in the side of your trailer. Weapons, ammo, water, dog food, washing powder and more can all be packed into the spaces between your boxes and the sides of your trailer. Get hold of a spool of military grade trip wire to use as snaring wire. As much as this may be difficult to mentally process, when you are hungry, you are hungry. You either survive or die. And, speaking of “getting hold” of something, make sure you get hold of a copy of the SAS Survival Handbook: The Ultimate Guide to Surviving Anywhere. This is available in PDF format, free, from https://www.pdfdrive.com/sas-survival-handbook-the-ultimate-guide-to-surviving-anywhere-e184196328.html. Don’t forget a sewing kit. This is a must. Include a tape measure and a pair of good scissors. As a morale booster, a pack of playing cards will go a long way. Knots you should know
A special thanks to Gabriel Florez, 101 Knots for his easy-to-understand diagrams. How to make a fire As you will eventually run out of gas, and if you can, buy a portable, freestanding steel heating, cooking, smokeless wood burning stove for camping and use in a tent, do so. They are quite expensive but worth every cent. In winter these stoves are an absolute blessing. Various models are available via Amazon. The benefits are: Easy to carry and clean: The folding racks on both sides increase the functionality of the stove, which can be used for placing tableware and drying items, and also as a carry handle. The chimney and other parts can be stored in the stove, saving more storage space. The foldable legs at the bottom also enable easy storage and transportation. The stove also comes with hook for easy bottom ash clean-out. Sturdy and stable structure: The stove’s durable steel frame enables its long time use in a harsh outdoor environment. It provides ample heating on top for cooking and boiling water. It also keeps a large tent warm in very cold conditions. It is perfect for backpacking and camping.
Photo Credit: YILI, Amazon.com Stainless steel chimney: The modular chimney pipe has seven sections, which, when joined together, gives ample height to ensure adequate ventilation of smoke to the outside of the tent. It comes with a hot tent stove jack, a square heat-resistant material which will need to be sown into your tent to protect it and prevent it from bursting into flames (see diagram above). Heat control: The door damper design can adjust heat output by rotating it, either to increase or decrease heat output. The removeable fire grate in the bottom is to protect the base from overheating, as well as to let more air enter into the stove to allow the wood to burn more effectively. The heat-resistant glass window, which allows you to monitor the flames, can be quickly disassembled and cleaned. Control and safety: The stove provides an excellent way of having a fire but without the dangers of sparks flying and setting surrounding bush on fire. Completely contained, the fire is totally and easily manageable and, by observing basic safety measures, as you would an open fire, you will not injure yourself. If you have children with you, teach them not to touch the stove ever, not just while it is in use. The fire may be out but the stove will remain hot for some time. Touch it and they will burn their hands. So, where to place the stove in the tent is a really hot issue. If you can’t get a stove, an ordinary fire will suffice. First, gather a few medium sized rocks to make a circle around your fire. Then gather tinder fuel to start and sustain your fire. So, to burn a successful fire, you’ll need three types fuel: tinder, kindling and firewood. ·
Tinder
includes small twigs, dry leaves, pine needles or dry bark. ·
Kindling
consists of small sticks, typically less than one inch around. ·
Firewood
is any larger piece of wood and is what will keep your fire going long into
the night.
Photo credit: Recreational Equipment Inc Do not gather or burn pieces thicker than an adult's wrist. This is because thick chunks of wood are rarely allowed to burn completely and are typically left behind as blackened, unsightly scraps. If you have matches or a gas lighter, making a fire is easy. But what if you don’t have these fire-starting tools. It’s then that you have to improvise. Your objective is to find the means to generate sufficient heat or sparks that will create a small smoking ember or coal which can then be dropped into a dry tinder bundle to light a fire. There are 4 primary ways to start a fire without matches or gas lighter: Friction:
Friction is the most common way of creating fire and requires you to rub wood together using a hand drill, fire bow or a fire plough. Hand drill: You will need a fireboard, a flat, half-inch thick piece of dry, dead, softwood, and a spindle, made from a thin branch or a still green stick of softwood about 18 to 24-inches long and about the width of your little finger.
The spindle should be sharpened only slightly on the ends. Create a burn-in-hole in the fireboard using a knife to make a small indentation that'll fit the end of the spindle. Carve a V-shaped notch in the fireboard where you drill. This is to collect the coal and hot dust that is formed. Place the fireboard on top of a leaf or piece of bark to collect the ember. Fit the spindle into the burn-in hole and place your hands on either side of the spindle. Rub your hands back forth to move the spindle and press downward to generate friction. Fire bow: Make everything as you would in 1.1 above. The only difference is that you are going to use a bow instead of your hands.
To make the bow, you will need a sturdy piece of wood with a slight curve that extends from your arm to fingertip. Make the bowstring from a length of paracord or other type of strong string. You will also need a top socket to hold the spindle in place while you drill. Loop the bowstring around the spindle. Put the spindle on the fireboard and place the socket on top of the spindle to hold it in place. Apply downward pressure on the socket and move the bow back and forth until it starts smoking. Continue moving the bow quickly for another minute or so until an ember is formed. Use the leaf or bark to transfer the burning ember to your tinder bundle. Fire plough: You will need a fireboard - a flat, soft piece of wood with a 6 to 8-inch groove. A plough, a flat piece of wood, 2 to 3-inches wide with an angled head that fits into the groove of the fireboard. Hold the plough at a 45-degree angle to the base piece of wood and begin moving the plough up and down along the groove quickly until a burning coal is formed. Sparks: Using materials like rocks or a flint to create sparks onto cottonwool rubbed in Vaseline is a standard way to create sparks that will start a fire. Sun: Concentrating sunlight through a piece of clear glass to generate enough heat to make a fire is a less conventional method, but it can work if you have the right tinder and weather conditions. Always carry a small magnifying glass with you for this purpose. Chemicals:
You can carry a little potassium permanganate and glycerine, which, when mixed, will combust. Add a couple of drops of water to quicken the reaction. This is the least common method because of the hazards of having to take potentially combustible materials on the trail. There are three different ways to build a fire: Cone: Start with a small cone of kindling around a few handfuls of tinder that are loosely piled in the centre of the fire ring. Once the fire is going strong and the temperature increases, you can add larger logs a few at a time as needed. Log cabin: Place two larger pieces of firewood parallel to each other and with some room in between to form the base of your structure. Then, turn 90 degrees and place two slightly smaller pieces on top and perpendicular to form a square. Place plenty of tinder inside the square. Continue adding a few more layers of firewood around the perimeter, getting a little bit smaller with each layer. Finish with a layer of kindling and tinder across the top. Remember to leave space between logs so the fire can get plenty of oxygen. Upside down (pyramid): Start with three or four of your largest logs side-by-side on the bottom layer. Turn 90 degrees and then add a second layer of slightly smaller logs on top. Continue alternating a few more layers in this manner, getting smaller as you go. Place your kindling and tinder on top. A few dos and don’ts. Build your fire on a clear, dry surface. Choose a spot that is at least 2 metres away from trees, bushes, low hanging branches and your tent. Never leave a campfire unattended. Don’t just burn trash and leave it lying around. Dig a hole, deep enough, and bury it. When abandoning your fireplace, scatter the rocks and ash, leaving little or no trace of your being there. Obviously, rivers and dams are your best source of water. Remember to filter and boil or purify the water before drinking it. If there are no rivers or dams, there are two methods of finding water. The first method is to look at the terrain around you. Anywhere you see dampness on the ground or green vegetation, dig a large hole a few feet deep, and you'll likely get water seeping in. The same is true at the feet of cliffs, in dry river beds, at the first depression behind the first sand dune of dry desert lakes, and in valleys/low areas. The second method is "water dowsing", which refers in general to the practice of using a forked stick, rod, pendulum, or similar device to locate underground water. This has been the subject of discussion and controversy for hundreds, if not thousands, of years. And, yet, it works, as I have found myself. It will mean digging a well, perhaps 30 metres deep, or more. This task should not be taken lightly as it is fraught with dangers such as a cave-in, which will kill whoever is down there.
So, as you dig down, be sure to shore up the sides in a manner that remains secure. And once you have water. Make sure you have a rope long enough to get a bucket down and up again, filled with water. Unless someone in your family group is an engineer or is technically astute, do not attempt digging a well. Go for the first option nine times out of ten. How to build a shelter if you don’t have a tent or caravan The importance of a shelter cannot be overstated. Your body temperature is key in your survival.
Depending on the weather and area, you may need to figure out shelter from rain, snow, cold, or heat. Stay dry. This will assist with keeping your core body temp where it should be. Especially during cold, wet weather. There are multiple methods of shelter building. From tarps being used as lean-to’s, small rock caves, a fallen tree with branch lean-tos.
The key is to keep yourself protected from the elements. This is where creativity and using sharp tools comes in, especially if you don’t have a tent or a caravan for a shelter. This being the case, you have to make your own shelter, even if you don’t have a tarpaulin. However, before we go on to talk about making shelters, and considering one of the biggest mistakes a person can make in their life, to assume nothing can go wrong, such a mistake could cost you your life. Know this: something can and will go wrong, and at any time. You just don’t know what it is yet. So, like a good boy scout and being prepared, and whether you are a man or a woman, your rucksack, moon-bag or handbag should have in it a decent Swiss penknife or a Leatherman multi-tool, a roll of paracord (ten metres), an emergency poncho, a small magnifying glass or BIC lighter, a small torch (with a spare battery), 500ml water and a couple of energy bars (e.g. nuts etc). Get into the habit of carrying this bag with you ALL the time, like it’s your inseparable best buddy. Desert or semi-desert shelter: A good shelter will protect you from the elements, such as sandstorms or the blistering hot sun, and could be the difference between life and death. It is far better to make every attempt to reduce the amount of water that is being lost by the body. Key to this is to seek shade and rest during the heat of the day. This simple decision can halve your water requirements. If you have material such as a poncho (not transparent), canvas or a parachute, use it along with such terrain features as rock outcroppings, mounds of sand or a depression between dunes or rocks, or a cave, to make your shelter. Watch out for snakes, scorpions, jackals and, in some deserts, predators such as lions and leopards. Baboons can be a menace and a danger too.
Image credit: National Geographic Bushveld or forest: In the Bushveld or in a forest, you will have plenty of material from which to build a shelter. In fact, only your imagination and what tools you have with you will limit what you can do. You could build a complete house, given time, patience and skill. So, let your imagination run wild. The easiest shelter to build is a “lean to”.
If you have a ready-available rock face you simply lean long poles, branches and other materials against it at about a 45-degree angle to create a roof. If a rockface is not available, lash a long pole between two trees to support your lean-to. The sides will be completely open but you can build a wall on one side to give you better protection. Build the lean-to so that it faces windward and blocks the wind. About one metre away from the open side, build your fire place. This will keep any wild animals away from your lean-to. Your lean-to panel can be made as per the diagram below. Two high panels can be joined together to make an A-frame. Making a shelter panel A shelter is much more comfortable if you can sit in it, rather than just lie in it. Out in the bush, you either have to deal with weather or prepare to deal with weather. Staying dry is essential. Water sucks the heat right out of your body. Being wet and cold is far more dangerous than being dry and cold. When you are submerged in water, your body loses heat 25 times faster than in air. In a cold environment, you need to construct a wall or walls that will keep heat in or reflect the heat from a fire back toward you and your shelter. This "reflector" is a wall, which is not part of your shelter and is on the opposite side of the fire. This reflector will provide you with much more heat, instead of that heat just getting lost to the open. It's good to have your shelter, with one entrance facing the fire at least one metre away, and then a wall on the other side of the fire. You can build walls by sticking two sticks in the ground, a few inches away from each other, and then pile sticks, debris, and/or earth in between them. Add two more support sticks a foot or two away from the first two, and continue this for several feet for a long wall. Tie the two sticks together at the top for added strength.
Image credits: Bushcraft Spirit In fact, in building walls like this, you can build a complete cabin. For the roof, make two lean-to panels. The size of your cabin will be determined by the length of the poles you cut. You can make/leave spaces for doors and windows using logs for lintels with uprights to hold the lintels up. You can make a door and windows using thinner poles using strips of bark to fashion hinges. In fact, with the right tools, you could get quite sophisticated with it all. How to make a bush kitchen If you are going to stay for an extended length of time, you may as well make your life in your bugout location as convenient and as comfortable as possible. Having a kitchen will be one of those luxuries. So, how do you build a camp kitchen? The name of the game is improvise, innovate and get your creative juices working. With your knife, axe, strips of bark or twine that you have brought along and your knowledge of knots, you can make tables, chairs, drying racks and a host of other kitchen “appliances” and utensils. It’s the ultimate camp kitchen pioneering project, providing a huge element of convenience to a wide range of camp cooking operations. The Chippewa Kitchen can provide a raised surface for food preparation, a nifty place to hang tools and utensils, a framework from which a pot can be safely suspended over a cooking fire, and primarily, a convenient, raised cooking surface for cooking over hot coals.
Image credit: 101 ways to survive, When using a knife, hand axe or panga (hatchet), take care – BE CAREFUL. Accidents happen very quickly and you don’t want to cut off a finger or a hand or cut a leg. Drum it into everyone’s heads – SAFETY FIRST. How to establish a vegetable garden The first thing the Farmer’s Almanac advises is to pick a good location for your garden. This is absolutely key. A subpar location can result in subpar veggies! Here are a few tips for choosing a good site: Sunny spot: Most vegetables need 6 to 8 hours of direct sunlight per day. There are a few veggies (mostly the leafy ones) that will tolerate some shade. Drains well and doesn’t stay wet: If you have poorly drained soil where water pools, plant veggies in a raised bed or raised row for improved drainage. Wet soil means wet roots, which can turn into rotted roots. If you have rocky soil, till and remove the rocks, as they will interfere with root growth and make for weaker plants. Stable and not windy: Avoid places that receive strong winds that could knock over your young plants or keep pollinators from doing their job. Nor do you want to plant in a location that receives too much foot traffic or floods easily. Plant in a location that would make Goldilocks smile—somewhere that’s “just right.” Nutrient-rich
soil: You soil feeds your plants. If you have thin, nutrient-poor soil, you’ll have poor, unhealthy plants. Mix in plenty of organic matter to help your plants grow. You will need a spade, a garden fork and a rake head (the shaft can be fashioned from a sapling or branch). Remember to pack these into your trailer. Follow these three basic steps in preparing your vegetable beds: Clear out rocks and debris: Dig up grass and/or plants, using a spade to cut the sod into small squares and pry from the planting area with the end of the spade. Remove any rocks and stones. Loosen the soil: Loosen soil to a depth at least 20 cm so that roots have room to grow, and reach down. Avoid clay soil. Clay is made up of very fine particles that are slow to absorb moisture or to drain. Clay soil holds its shape when rolled into a ball. It can bake hard in summer and become waterlogged in winter. Also avoid sandy soil. This is made up of large particles that drain quickly. Sandy soil does not hold onto nutrients very well, which is not what you want. Silty soil is better as it is made up of smaller particles than sandy soils. It has a slightly slippery, floury feel and holds onto moisture and nutrients for longer.
The perfect balanced soil is called “loam”, which is the ideal soil. Its texture consists of equal parts of sand, silt, and clay. This type of soil has that perfect balance—it holds moisture but also drains well, allows oxygen to reach plants’ roots, and is rich in humus (organic matter). It’s fertile, easy to work, and contains plenty of organic matter. Add organic matter: In the spring, remember to add organic matter such as compost, that will get you off to a good start! Add on a day when the soil is moist but not wet.
Spread a minimum of five to eight centimetres of compost or aged manure onto your soil (and no more than ten centimetres). Many gardeners will dig the organic matter into the soil. However, there’s also a no-dig philosophy to expose fewer weed seeds and not disturb the soil structure. Simply leave the compost on the surface. Let the worms do the digging in for you! So, how do you find out how much sand, silt, or clay is in your soil?
The simplest and most generic method is the feel test; rub a moist sample of soil between your fingers. Sand will feel gritty, silt smooth, and clay sticky. Another test is the ribbon test; with this test, squeeze a small, moistened ball of soil between your thumb and forefinger to create a ribbon. Sand or sandy soils won’t ribbon. Loam, silt, silty clay loam, or clay loam ribbons less than three centimetres. Sandy clay loam, silty clay loam or clay loam ribbons three to five centimetres. Sandy clay, silty clay or clay will ribbon more than five centimetres. If you have poor soil, work in the compost. Or, if you have hard, compact soil, consider building a raised bed. Or, you could grow in planters and containers. Level the garden bed with a steel garden rake before planting. Lastly, your soil should be slightly acidic.
Every fertilizer label will give information relating to its “N-P-K” content, expressed as a number ratio. Tomatoes and root crops favour a ratio of 5-10-10. Nitrogen (N) promotes strong leaf and stem growth and a dark green color, such as desired in broccoli, cabbage, greens and lettuce, and herbs. Add aged manure to the soil and apply alfalfa meal or seaweed, fish, or blood meal to increase available nitrogen. Phosphorus (P) promotes root and early plant growth, including setting blossoms and developing fruit, and seed formation; it’s important for cucumbers, peppers, squash, tomatoes—any edible that develops after a flower has been pollinated. Add (fast-acting) bonemeal or (slow-release) rock phosphate to increase phosphorus. Potassium (K) promotes plant root vigour, disease and stress resistance, and enhances flavour. It’s vital for carrots, radishes, turnips, and onions and garlic. Add greensand, wood ashes, gypsum, or kelp to increase potassium. If you can, carry a bag of fertilizer in your trailer. It will help you get your first crop going and ensure a better harvest when the time comes. You will also need to make your own fertiliser by making your own compost. There are two main ingredients in any successful compost pile: carbon-rich ingredients and nitrogen-rich ingredients. The carbon camp is often referred to as “browns,” because it includes things like dried leaves, dried grass clippings, cardboard, and straw. Nitrogen-rich “greens,” on the other hand, include fresh leaves, fresh grass clippings, and vegetable scraps; the name is a bit of a misnomer, however, as manure, a very nitrogen-rich substance, is also included in the green camp. You’re going to need at least one source of each for your pile. Keep your compost moist – not too wet and not too dry. Once you get to harvest, don’t forget to harvest seeds for your next crop. Saving seed from one year to plant the next is an age-old tradition. It may sound like extra work but the results can be extremely rewarding and ensure your continued survival. Some vegetables produce seeds more easily than others and are more likely to produce good yields. For example, it is generally not recommended that you save seed from vegetables in the squash family, as the same variety will rarely grow the following year and what does grow can be inedible. On the other hand, it is easy to save seeds from peas and beans and the seeds produce good plants the following year. Saving seed involves three steps: selecting seeds from the most suitable plants, harvesting them at the right time and storing them properly until you need to sow them. Seeds should be stored in individual envelopes, in an airtight container and in a dry place above ground level. This prevents moisture from spoiling the seeds or animals such as mice eating their way through your supply. It is important to label your seeds correctly, including the name, variety, and date you collected them. Not only does this ensure that you know which seeds you are sowing but you can also evaluate how successful each seed-saving project was. Tomatoes, peppers, beans and peas are good choices for seed saving. They have flowers that are self-pollinating and seeds that require little or no special treatment before storage. Seeds from biennial crops such as carrots or beets are harder to save since the plants need two growing seasons to set seed. Plants with separate male and female flowers, like corn and vine crops, may cross-pollinate. It is difficult to keep the seed strain pure. How to protect your crop? In a bugout situation, you are simply not going to have all the techniques and technologies to protect your vegetable crop. What you can do is protect your crop from extreme variations in temperature using a Wonder 3m x 10m Plant Guard or similar, monitor for caterpillars and other bugs and when it comes to planting your second crop, rotate your crop. Crop rotation is of great importance in the fight against pests and diseases of crops. This factor decreases the phytosanitary potential by 2- 6 times compared to its level in permanent crops. In this case, specific weeds, diseases, pests disappear. Corn is characterized by stable self-compatibility and can be grown for 4-5 years in one and the same area. But peas, sugar beets, wheat, barley, oats, rye, vetch negatively react even to one repeated sowing and, on the contrary, will give an increased crop when they are correctly placed in the crop rotation. When and how to harvest your vegetables. On the back of the seed packets, you will find information about when to plant and when to harvest your crop. To wrap up this section, I can only give you a summary here of what needs to be done to develop and maintain a vegetable garden. It is advisable that you by a book on vegetable gardening, and study it. Your life and those of your family group will depend on it. And, get another member of your family group to study the book too. There is nothing like having a backup. How to make biogas You can make biogas with a DIY methane generator. Producing methane from animal manure or human faeces mixed with food waste or plant leaves using your own small-scale waste-to-energy biogas digester is feasible for many preppers in a bugout situation. When methane burns in the air it has a blue flame. In sufficient amounts of oxygen, methane burns to give off carbon dioxide (CO2, 20x less polluting of the atmosphere than the original methane) and water (H2O). When it undergoes combustion it produces a great amount of heat, which makes it very useful as a fuel source. Burning methane, following safety rules, is quite safe and does not contaminate the food you are cooking. Biogas or methane, is produced through the decomposition of organic wastes. The decomposition of organic materials by bacteria occurs in an oxygen free or anaerobic environment. Its chemical notation is CH4 and it is a colourless, odourless (which makes it dangerous in a closed room/tent), and, of course, is flammable gas. Methane is widely used in mains supplied natural gas. This is how you make your own biogas generator: Take a 50-litre Jojo PVC drum with a screw on lid or a 210-litre drum, also with a screw on lid and cut a 110mm hole in the top off to one side and a 10mm hole in the middle. Take an appropriate length of Marley underground PVC pipe (110mm diameter) and insert it into the equivalent sized hole so that it is three quarters into the drum and one quarter out of the drum. Glue it in place with PVC Weld/Cement. Then take a large 32cm plastic funnel and cut off the thinnish, narrow part and glue it to the top of your 110mm down pipe, also using PVC Weld/Cement. Take a GAV 8mm Hose Adaptor with Hose Clamp (1/4 Inch) and insert it into the 10mm hole in the middle of your screw-on lid.
Bolt it in place on the inside and clamp the Alva reinforced rubber gas hose on, on the outside. At the end of this gas pipe, insert and clamp a 10mm Hose Barb inline brass shutoff mini ball valve. Attach and clamp a short piece of gas hose and on the opposite side insert a Safegas Y gas hose connector. Off the top/bottom of the Y, attach and clamp a short length of hose with a another 10mm Hose Barb inline brass shutoff mini ball valve. On the opposite side if the valve, attach and clamp a length of gas hose that will connect with your gas stove. Back to the Y connector. Attach and clamp a length of gas hose, long enough to reach a car or tractor tyre tube that will serve as the gas storage bladder. You will need to remove the inside of the tyre valve so the gas can move freely into and out of the gas bladder. Clamp the gas hose onto the bladder valve. When the bladder is fully inflated it means you can use the gas for cooking and/or heating, or even running a car converted to run on methane gas. Finally, cut a 50mm hole in the side of your PVC drum and insert a short length of Marley 50mm PVC waste pipe and glue it in with PVC Weld/Cement. Attach right-angled connector to the end and attach and glue a short downward piece. Place a bucket under it to collect any slurry overflow, which can be used, when dried out, and added to your compost heap, it can be used as fertilizer after about three months. Pros and Cons of Methane Generator Systems The advantages are that it makes good use of organic wastes. You can obtain fuel from sewage sludge and animal slurries first, and prevent runoff and methane emissions at the same time and you still get fertiliser at the end of the process. Is a clean, easily controlled source of renewable energy. Uses up methane, a powerful greenhouse gas. Reduces pathogen (disease agent) levels in the waste. Residue provides valuable organic fertilizer. Simple to build and operate. Low maintenance requirements. Can be efficiently used to run cooking, heating, gas lighting, absorption refrigerators and gas-powered engines. No smell (unless there’s a leak, which you’d want to know about and fix immediately anyway!). The disadvantages are that it is most practical to be generated and used at the source of the waste. This is because the energy needed to compress the gas for transport, or convert it into electricity is excessive, reducing the efficiency of biogas energy production. Safety and basic precautions must be adhered to. Each kilogram of biodegradable material yields around 0.4 m (400l) of gas. So, in practice, in small scale waste to energy systems, if you have some livestock, plus kitchen and human waste you can meet your cooking and lighting needs quite easily. Using a two gas rings stove for a couple of hours a day will use between 1 and 2 m3. Gas lights need around 0.1 m3 (100l) per hour. Driving any kind of engine (eg a generator or a pump) is, however, way beyond the domestic-scale. What size methane generator is needed? If generating methane from manure, collect dung for several days to determine average daily dung production. On this basis, the appropriate size biogas digester plant can be calculated. For example, where 55 kg of dung a day is available a 8 m3 plant is warranted. Where it’s only 6 kg of dung a day, a 1 m3 plant will suffice. For a family of 8 with a few animals (say 8-10 cows), a 10m3 digester is a commonly used size in India, with 2m3 gas storage. How long you leave the material in a batch digester depends on temperature (2 weeks at 50oC up to 2 months at 15oC). The average is around 1 month so gauge how much material you will add each day, and multiply it by 30 to calculate the size of the digester. While anaerobic digestion occurs between 0oC and 65oC, the optimum temperature range for methane generating microbial activity is 29oC to 35oC. Little gas production occurs below 16oC. In colder climates placing the digester in a greenhouse, and perhaps using some of the methane to warm the system, are possible strategies. The biogas digester is the system component where the animal, human and other organic wastes are introduced, usually as a slurry with water, to break down anaerobically. Like electricity and other energy systems, safety is usually assured so long as the risks are understood and sensible precautions are followed. Methane is obviously flammable, and can even be explosive. With this in mind the methane generator digester area must be well ventilated to prevent the accumulation of trapped gases. In the vicinity of a digester no naked flames are permitted, electrical equipment must be of suitable quality, normally “explosion proof”, and other sources of sparks are any iron or steel tools or other items, power tools, normal electrical switches, mobile phones and static electricity kept a safe distance away. Biogas displaces air, reducing the oxygen level so any digester area needs to be well ventilated. While the spent slurry has lost a lot of its pathogens, there’s a lot of microbial activity at work in producing biogas energy! So, avoid contact with the digester contents and wash up thoroughly after working around the methane generator (especially before eating or drinking). How to make a wind generator Building a wind generator is actually quite easy. All you need is a Nissan Micra II (K11) engine radiator cooling fan and motor. You won’t need the frame except for the centre back housing to use when you mount your finished windmill on a pole. As the blades will be too short to serve in a windmill role, you will have to create a new set of blades. First, remove the Teflon fan from the motor. Second, take a length of Marley underground PVC pipe (110mm diameter) and cut a two 50cm lengths from it. Then cut these lengths into four longitudinal sections, each 50 cm long with curved 86,25 mm widths. You may lose 2,25 mm on the width through the cutting process. You will have eight lengths but will only need five as the fan has only five blades. There is one further modification you will need to do to these five lengths. Make sure that each length is cut, as per the diagram below, on the same side so that you maintain uniformity.
Image Credit: Tony Stone Once the cutting is done, affix the wider end of each length to a fan blade using three 8 mm bolts and nuts. Remount the blades onto the motor. Re-attach the centre back housing and fashion a mechanism to attach the now finished windmill to a pole. Obviously, the positive, negative and neutral wires will need to be a little longer than the pole so that you can connect to a car battery. And, viola, you have a windmill generator. You should get up to 20 volts output to the battery depending on the windspeed. It may be a good idea to put a drop voltage regulator between your windmill and the battery as well as an on/off switch. You will also need to measure your battery charge using a multimeter. A healthy car battery should register about 12.6 volts. It's important that you test the battery after it's been sitting for at least an hour, to get what's called the 'resting voltage'. If you've recently run your windmill generator (and as long as the charging system is working correctly) the battery is likely to give a higher reading than the resting voltage, which could be misleading. Using a multimeter to test a battery is easy. The first thing to do is make sure you can access the battery terminals (the metal connections on the top or front of the battery). Set the multimeter dial to 20, which will allow you to accurately measure between 0-20 Volts. Touch the red probe to the positive (usually red) terminal, and the black probe to the negative (black) terminal. The terminals will be marked + and -. If you get a reading with a minus in front of it (-12.6 rather than 12.6) you've got the probes the wrong way round! The resting voltage should ideally be no lower than 12.6V. A battery that reads 12.2V is actually only 50% charged, and is classed as discharged below 12V. If the multimeter reads less than 12.6 volts, disconnect the battery and fully charge it. While the windmill generator is on, conduct the same battery test as above with your multimeter. A healthy charging system should give a reading of between 13.8V and 14.4V. While in your destination location, other people may come across your location. How well they prepared for the situation you are in will determine their friendliness or not. As you will not know, you will have to assume every stranger to be hostile and be prepared to protect your own. If they are hostile, they will want what you have. So, you and your entire family group will need to be on your guard 24/7. Security awareness must be uppermost in everyone’s mind. When you get to your destination, put up a sign at the main access point. It should read:
Image Credit: Tony Stone This will make them stop and think, and let them know you will brook no nonsense. Never let them into your inner sanctum. Never show fear but quite confidence. Put on your poker face. You will need to create the impression you have depth to your defence such as an overwatch sniper – even if you don’t have one. Trust your gut. If they don’t look kosher, tell them to bug off. Stand your ground. Once they are “gone” be on the alert, and on guard. At the same time, they may be good folk just as scared as you are. Assess them carefully. Establish who they are, where they are from and observe what they have. Ask them what they have. You cannot afford to place a drain on your own limited resources. Even so, and yes, there is strength in numbers. If you can grow your group without compromising your existing group in any way, then do so. But, be extremely cautious. Don’t trust them until such time as they demonstrate they can be trusted. One way to do so is to allow them in but to hand over their weapons first, and tell them why you are doing it. If they are not prepared to do this, bid them God speed. If they are, take their weapons but watch your back. Hidden weapons are equally dangerous. As they say in South Africa, "hamba ghashle”, which means “go well, go safely”. Once you trust them, give them their weapons back. This will build trust between the new, bigger group. Ensure that their leader(s) is/are included in the decision-making processes and their people are included in the day-to-day chores. Keep a Night Watch Day or night, in a bugout situation, can be the scariest time in the wilderness. However, we can learn from the wilderness, and the little meerkat, a small mongoose found in southern Africa. The prospect of being taken by surprise and one or more falling prey to predators is met by sentinel behaviour. One meerkat takes up a raised position on a termite mound or tree branch, where it sits erect and watches. The others are aware the sentinel is on duty. If the sentinel sees a predator approaching, it alerts the others with a high-pitched call, and the pack scatters for cover. Pack members take turns in fulfilling this role. Your group need to be like a pack of meerkats. In the wake of a disaster, those fears may be well founded. Since the beginning of time, desperate people have performed despicable acts in times of crisis. And in a prolonged emergency, it’s quite possible that your group will need someone or several people to stand watch against “outsiders.” It may also make a lot of sense to avoid drawing attention to your camp in the darkness. This could mean no fires or bright flashlights after dusk—or no light at all from dusk till dawn. When in your bugout destination, know when to say when, if ever needed You need to keep in mind that your bugout location could become compromised. As is was when you decided to bugout and leave your home, you may have to bugout from your bugout. So, if this happens, it will be another worst day of your life. Psychologically and physically, you will need to be prepared for such an occasion should a bug-out-again situation arise. People are likely to feel threatened and vulnerable. It’s up to you as their leader to keep it together and keep the family group together. It would be advisable to have a bug-out-again plan and a destination. Surviving the long-term, or going home How do you put your life back together in the aftermath of a bug-out-worthy disaster? In recent decades, a small percentage of the world’s population has had to bug out, then begin their life again. To do this in the world that currently exists, you will need money, documentation that proves you are who you say you are, and a place to go. If your home was destroyed in the disaster, this will leave you scrambling to find a new place to live. You may also need a new source of income as your money quickly runs out. In localized crisis situations, aid often floods in from other areas—but it’s an uncharted territory to rebuild your life in the wake of mass destruction and casualties. Let’s just hope we never have to find out how hard it could be to start all over again from scratch. But, know and remember this, after the storm, the sun will come out again. Eventually, and as the situation dictates, and you are able to return home, don’t expect to find your home as you probably left it. Don’t get distraught if it isn’t. knuckle down with the same fortitude you had before and start rebuilding your life. And remember, you purpose in life is to survive, to enjoy family and friends and recreate what you had once before. That is your purpose. If it means staying where you are and rebuilding, do so, with the same purpose – and love the Lord your God with all your heart and with all your soul and with all your mind. May the Lord bless you and keep you. May the Lord make his face to shine upon you and be gracious to you and may the Lord give you peace. |
|||||||||||||||||||||||||||||||||||||||||||||||||||||||||||||||||||||||||||||||||||||||||||||||||||||
|
|
|
|||||||||||||||||||||||||||||||||||||||||||||||||||||||||||||||||||||||||||||||||||||||||||||||||||||
|
|
© 2025 Copyright Tony Stone, South Africa |
|||||||||||||||||||||||||||||||||||||||||||||||||||||||||||||||||||||||||||||||||||||||||||||||||||||